

How To Add Hard Drive To Router For Plex Server 2018
You lot NEED to take a Plex server

Growing up in Sri Lanka, the best way to lookout western movies or Goggle box serial was to download and burn down them to DVDs (or rent or get from friends). Until recently (6–7 years), Netflix was not a household proper noun in Sri Lanka due to many reasons mainly existence the bandwidth limitations.
Simply when SLT introduced the off-pinnacle GBs and Dialog had the "50rs-1hour-unlimited browsing" bundle, everyone who was into the whole collecting movies/tv-show started downloading shows in majority; and I did the aforementioned. Because of this, back in the Uni, we literally had a customs chosen "Movie + Tv Series downloaders and sharer's community" 😅. The whole purpose was to download and share movies and telly-shows among friends, so everyone will have admission to almost all the shows and no one has to download the same thing again.
To collect these shows, I had to buy external hard drives. Because what I did earlier was to burn everything onto DVDs and keep them saved in my closet. Investing in an external HDD made more sense fifty-fifty it was just for this light-headed purpose then I started with simply 500GB and when I finished Uni, I had a total of 8TB external HDDs.
That was expert and fun back then, merely when Netflix came to the picture, spending 9USD was easier than taking an external HDD everywhere, I kinda forgot near the stuff I collected over time. When I first moved to Canada, I but brought one external HDD, because I didn't see the use of information technology as Netflix had almost all the shows I like (that'southward what I thought) and external HDDs are heavy. But due to content provider restrictions, many of the movies and tv-shows are not allowed on Netflix-Canada, and to watch them, I had to subscribe to other services. (ex: Friends is not available on Netflix-CA, only on Require.ca). When I returned to Sri Lanka concluding year, one of my primary goals was to bring back all my external HDDs, so at to the lowest degree I tin plug and watch them.
Afterwards bringing all the HDDs, the next trouble was plugging and watching was a real pain. If I want to lookout man it on Tv, and then plug the ex-HDD into the TV, if I want to picket it on my laptop, use the adapter and plug the ex-HDD into the laptop, etc. and at that place was no way to watch stuff on the phone or the tablet.
I started looking into investing in NAS (Network Attached Storage) after watching a few Linus Tech Tips videos. But presently I realized, what'south in the market is way over my budget for simple use and they are overkill. And so I started looking into smaller and cheaper options. Then I found out about this video.
This was like a jewel for me considering it covers everything I wanted. So I started gathering stuff to build my Raspberry Pi — NAS.
Note: I'k not going to list down all the instructions, because information technology's already covered in this video. Only I'll exist listing down all the commands, as information technology'southward missing on the video.
These are the stuff I bought:
- Raspberry Pi 4 Model B
- SanDisk 32GB Ultra microSD
- Flirc Raspberry Pi 4 Instance
- Raspberry Pi 4 Model B Official PSU
- Seagate I Touch on 2TB External Hard Drive (yeah! 8TB was not plenty 😅)
For all this, I spent around CA$ 320+tax. Merely note that the cost of the RPi had skyrocketed maybe due to the supply chain problems.
Alright, at present these are the steps:
Step 1: Bake the Pi 🥧
- Insert your SD menu into a card reader and plug information technology into your laptop.
- Download the RPi installer and install it on your laptop
- Run the program and fill the boxes with the required details.
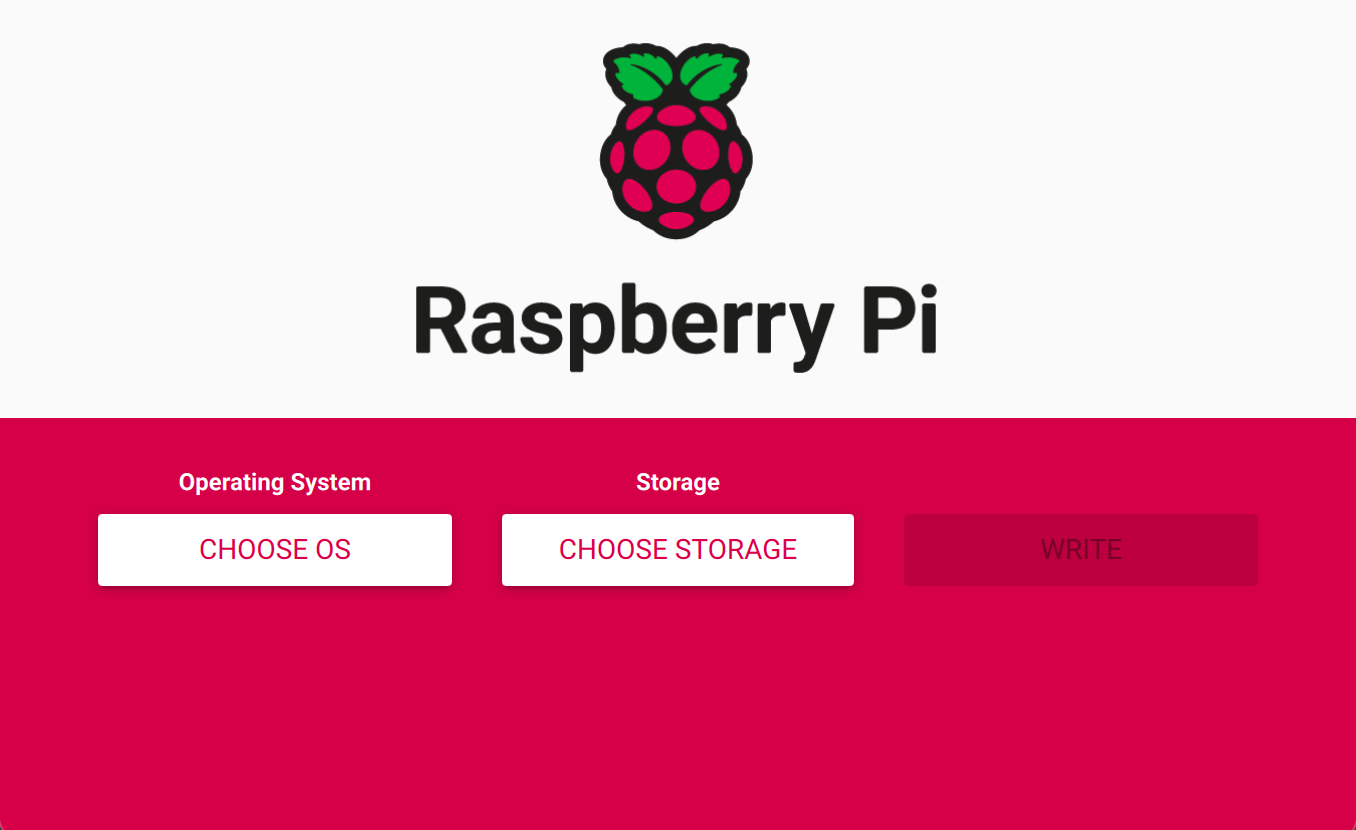
- When selecting the Bone brand sure to select the Lite version if you are planning to go on with the headless (SSH) arroyo.

- Then select your SD card for the storage and enter "cmd + shift + x" or on windows "cmd + shift + x" to open advanced options. From here merely enable SSH and prepare the countersign for the user and click Save. You can change other options if yous need to.

- Lastly; hit "Write" and your Pi is now baking.
Note: As I mentioned, if y'all are going with the SSH route, select the low-cal OS. If you lot select the full version, it will requite you an fault when installing the Open Media Vault via ssh.
Step 2: Connecting to the RPi via SSH 🔗
- Insert the SD card with the fresh Bone install to your RPi.
- Next, follow up with plugging in the network cable (comes from your switch/router) and then the ability cable.
As soon equally your RPi boots up, log into your router and become the IP address of the device. If your router is capable of setting upward static IP addresses for devices, I recommend you practise that for the RPi for easy admission.
Once you have the IP accost (ex: 10.x.xx.20) of your RPi, at present let's connect to it via SSH. Earlier that, first, ping the IP and bank check whether information technology's online.
ping 10.10.xx.twenty if the ping is a success, and so press control+c to leave, and at present lets ssh. the text pi yous have before the @ is the username you added when baking the RPi.
ssh pi@10.10.20.20 Note: if you have but i RPi connected to your network, yous can use the following to connect to your pi as well;
ssh pi@raspberrypi.local
it's going to ask y'all to enter the password (if you haven't set one up, the default is raspberry), and then voila; you are in.
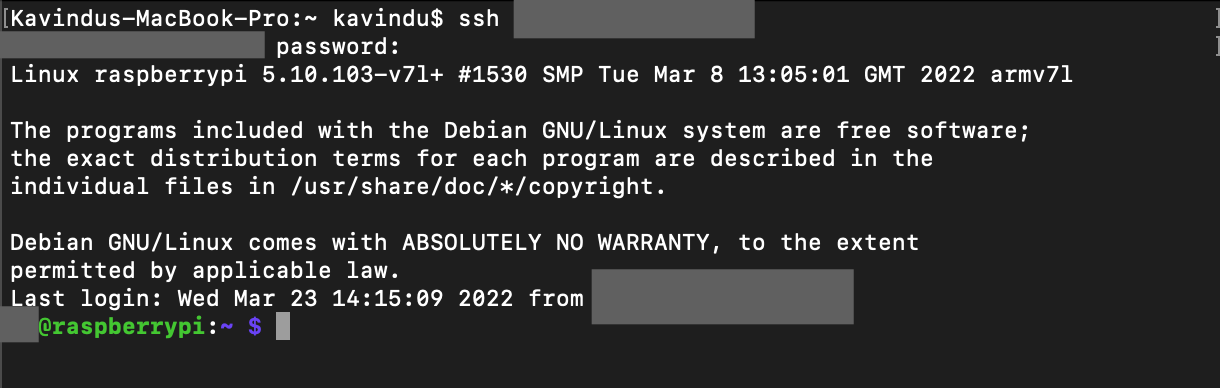
Note: If you lot are having issues with connecting to the Pi afterwards several times, or getting the "Warning: REMOTE HOST IDENTIFICATION HAS CHANGED!" error; only enter the following command to reset.
ssh-keygen -R ten.x.xx.xx
Step 3: Updating the Pi and Installing Open up Media Vault 🖥
I'm gonna list the adjacent few commands in gild, then it won't be a lengthy caption and if you want ane, please spotter the video above.
- Update the Raspberry Pi
sudo apt update && sudo apt upgrade - Install OpenMediaVault: OpenMediaVault is a gratuitous Linux distribution designed for network-attached storage. The community support and the versions are solid as of now and it'due south very easy for even a noob to go the hang of it.
sudo wget -O — https://raw.githubusercontent.com/OpenMediaVault-Plugin-Developers/installScript/primary/install | sudo fustigate This is going to take some time and once you are washed with information technology, enter your RPi'south IP address in your spider web browser and it's going to take you to the following webpage.
username: admin password: openmediavault
As soon every bit you lot log in using the default username and countersign, click on the elevation-right gear icon ⚙️ and alter the password.
Step 4: Setting upward the HDDs 💾
The first pace is to plug in your external HDD. Earlier that, at that place's something that you lot should be enlightened of. When y'all are setting up the shared drive and the services, if your HDD has already has data y'all won't exist able to proceed with setting up NFS. It will return an error and the style to continue is to format the HDD and re-mountain the HDD. That existence said, you can proceed with no problem at all and yous can access the NAS on Windows, Mac & Linux. That existence said, you might have an issue with writing to the drive over the network. Then if possible become with a new HDD (I know that defeats the whole purpose, only information technology's entirely upward to you).
Mountain the HDD
- Go to
Storage → Disksand cheque whether you can see your ex-HDD there. - Then go to
Storage → File Systems, click on the+button and mountain your ex-HDD. - Then you volition be able to run across something like this
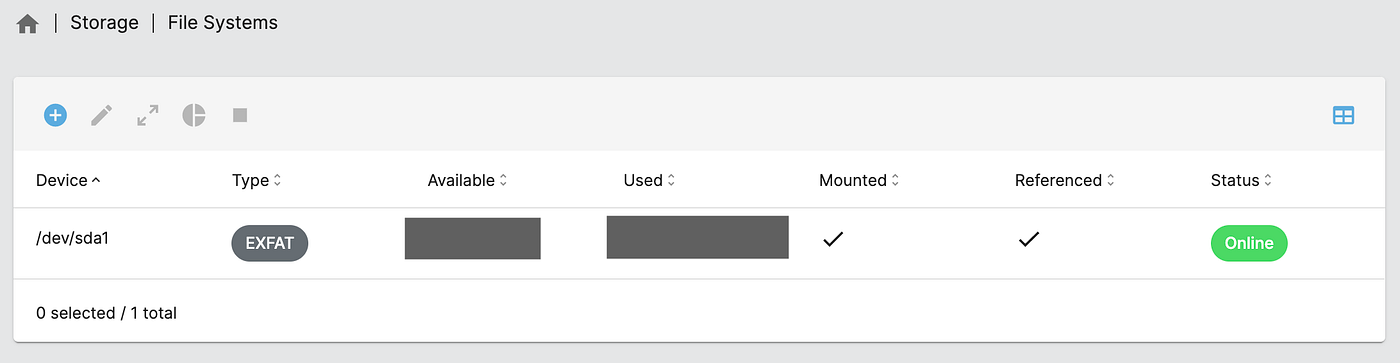
Whenever you make any alter on OMV, yous will get a yellowish banner on top of the page to apply the changes. Unless you click on utilize, all your changes will not have an effect. As a practise, utilise your changes while working on things.
Create a Shared Binder
- Go to
Storage → Shared Foldersand click on the+sign to add a shared binder.
From hither, you can give a proper name to your shared folder, select the file organization, add together bones permissions, and save the shared folder.

But note that when you are clicking save, yous might get a permission error. If you get that, click cancel, become back to the list view, click on the unsaved shared binder listing item and click on Privilages. It'll take you to the post-obit page and change the permissions to Read / Write for the user and click Relieve. If you lot go back to the shared binder save view, now you'll be able to salvage that folder.
Setting upwardly Admission (NFS, SMB, etc.)
This process is straight forward but this is where you will face the issue I mentioned before.
To add service, click on Services → SMB/CIFS → Settingsor Services → NFS → Settingsand click enable. It'southward simple as that. Afterward enabling, click on the Shared option and add the shared binder to these services. When you try to utilise the changes, you will get an error (500), and to resolve that, yous will accept to format and remount your HDD. It'due south because of a compatibility issue with NFS, just if yous are just going to employ SMB, in that location's no problem at all. Yous tin can access the NAS from both Windows and Mac.
Accessing your NAS
If you did everything as mentioned to a higher place, your NAS should be up and running. Now, let'southward access information technology. On Mac, open the Finder app and click on Go → Connect to Serverfrom the options or just press cmd + yard. This will open the connect to server window and here add the post-obit and click on Connect 🤞.
smb://x.x.20.xx/SharedFolderName/ If the connection is successful, now y'all can see your NAS under your locations on your mac. Merely expect, you don't see whatsoever of your content there 🤔. At present permit's ready that, shall nosotros? The reason for you lot to now come across the content, is considering y'all created a shared folder in the ex-HDD, so now it's a child binder of the HDD. You lot need to unplug the HDD from the RPi, connect information technology to the laptop, and move all the content that's outside of the Shared binder into the binder. Reconnect the HDD to the RPi, and voila; you have all your content in a NAS.
After going on a huge tangent, let's come dorsum to the actual topic. What'south Plex and how to install information technology onto your Raspberry Pi NAS. The easiest mode to explicate what Plex is that's it's your ain Netflix. Yous tin consume media on your storage devices from any client device using their modern and user-friendly apps.
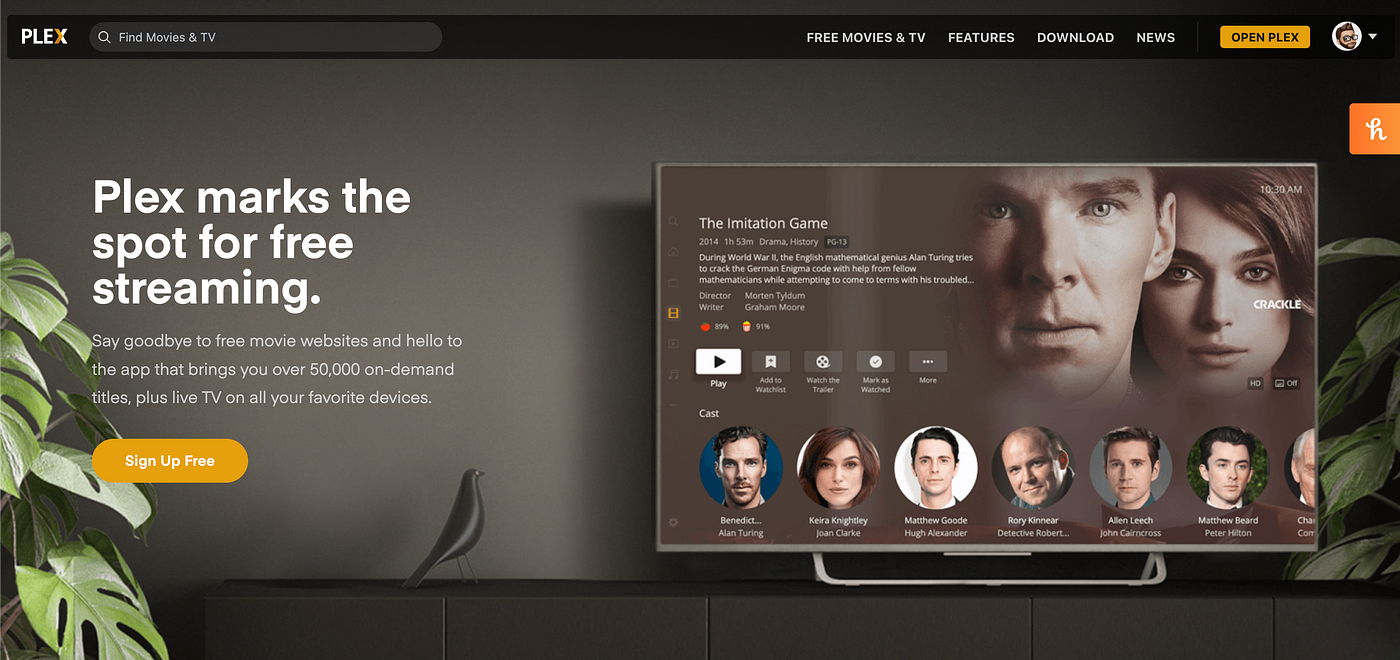
You can sign up for a free Plex account and use that to access your library. They have the paid options and well with more features, but it's not needed for our day-to-day use.
Merely why did I fix up a NAS before setting up the Plex server? You lot can of course get ahead without the NAS and but set upward the Plex server. But the problem you will confront is that, if yous desire to add more than content, yous will take to unplug from the RPi, connect information technology to the laptop and copy content (or if you install the full Bone, y'all can use it as a regular computer with a monitor and an IO tools). But with a NAS, yous can easily access the HDD and manage content there and the Plex server will be automatically updated.
Step five: Install Plex Media Server 📺
- SSH back to your RPi
ssh pi@10.10.xx.20 - Install the
apt-transport-httpspacket. This bundle allows theaptpackage managing director to retrieve packages over thehttpsprotocol that the Plex repository uses.
sudo apt-become install apt-ship-https - Now add the Plex repositories to the "apt" keyrings directory
curl https://downloads.plex.tv/plex-keys/PlexSign.key | sudo apt-central add together - repeat deb https://downloads.plex.tv/repo/deb public chief | sudo tee /etc/apt/sources.list.d/plexmediaserver.list
- Update the package list and install the latest version of the Plex Media Server. Effectually 40% of the installation, you will get a prompt to enter Y or Due north. Go with N (no) for the easy installation.
                sudo apt update
sudo apt install plexmediaserver
If you didn't get whatsoever errors, that's information technology! Y'all've successfully installed Plex on your NAS. Now type the post-obit on your browser to gear up up Plex Media Server.
http://10.x.xx.twenty:32400/web Annotation: if the setup page takes a long fourth dimension to load, just refresh the page and it'll have you lot back to where y'all should be.
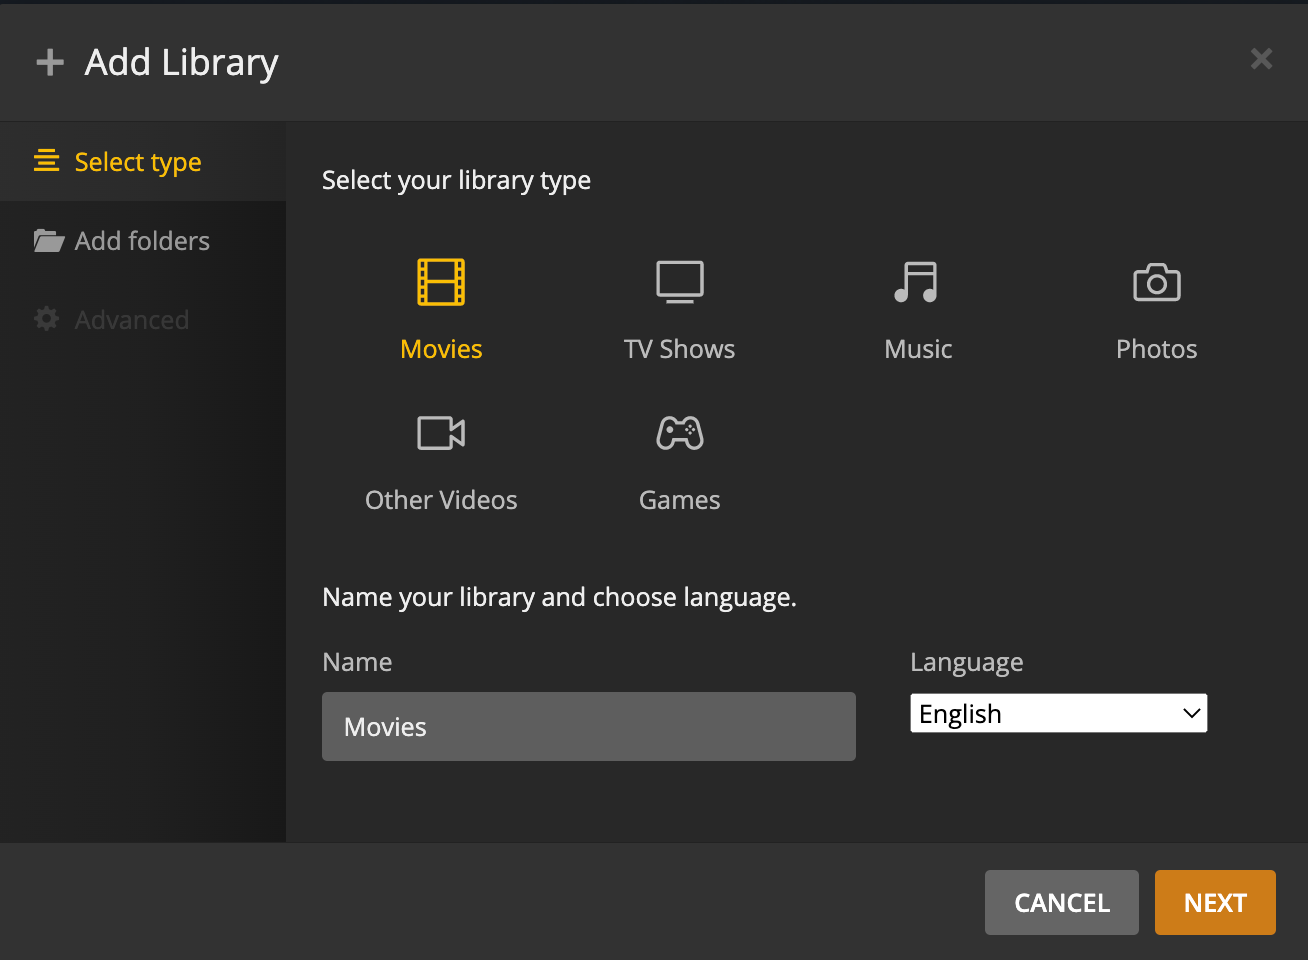
Afterwards the setup is washed, you lot can showtime calculation your media to a Plex library. Select the blazon and when adding the folder, you can add them from your NAS. It's easy as that.
This is a very cheap and interesting project for me to try on because, with all the data I manage, this was a no-brainer. I'm planning to continue on this build by calculation other features to the Raspberry Pi and if you are interested, consider subscribing to the newsletter.
Alright, folks! That's information technology for at present. If you accept whatever questions or any suggestions, feel complimentary to comment below.
Signing off:
Kavindu Narathota
(www.narathota.com)
Update — March 27, 2022
How to Update the Plex Server to the latest version
From time to fourth dimension, you might get an alert on your Plex server to update it to the latest version. You can bank check the version or if there are whatsoever updates on the Full general Settings page as well. While there are and then many ways to update the server, the easiest way I've figured out is to update information technology via openmediaserver update settings. Just go to http://10.x.twenty.xx/#/system/updatemgmt/updates and refresh the page and update the required package. It's easy as that!

How To Add Hard Drive To Router For Plex Server 2018,
Source: https://medium.com/@narathota/you-need-to-have-a-plex-server-e999da6e78c8?source=read_next_recirc---------2---------------------926abbc8_fe62_408f_a924_2da88298ce74----------
Posted by: lyonsupor1988.blogspot.com
0 Response to "How To Add Hard Drive To Router For Plex Server 2018"
Post a Comment